How to add Live Chat to your WordPress Website
Learn how to add live chat to your WordPress website and how to add AI chatbots to increase sales and reduce costs.
Live chat enables real-time engagement with visitors, allowing you to quickly address their inquiries and resolve issues. This capability can boost online store sales and build brand loyalty with existing customers.
Live chatbots can enhance websites by providing instant customer support, automating responses to customer queries, and guiding users through inquiries efficiently.
How to add Live Chat to your WordPress Website
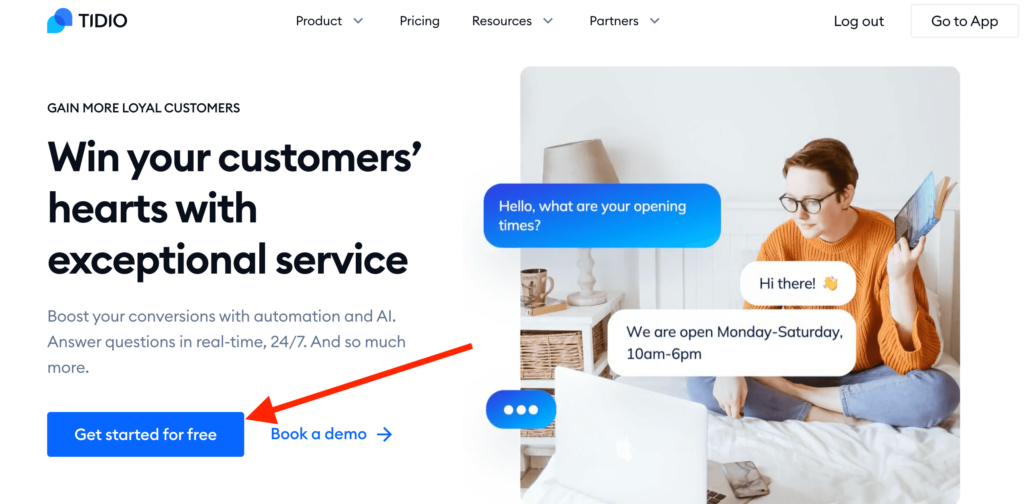
First of all you will sign up for Tidio by clicking here and when the page loads, click on “Get started for Free”.
You can use Tidio for free forever but Tidio also has paid plans which provide more features. Tidio provides a free trial for the first 7 days where you can try out all of the paid features.
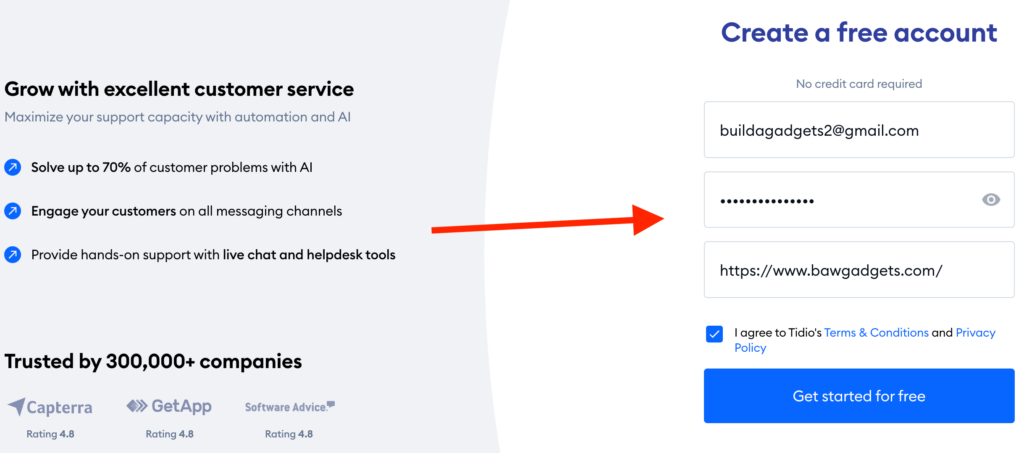
Create an account for free by entering an “Email”, “Password” and “Website” URL. Tick the “T&C’s checkbox” and then click “Get Started for free”.
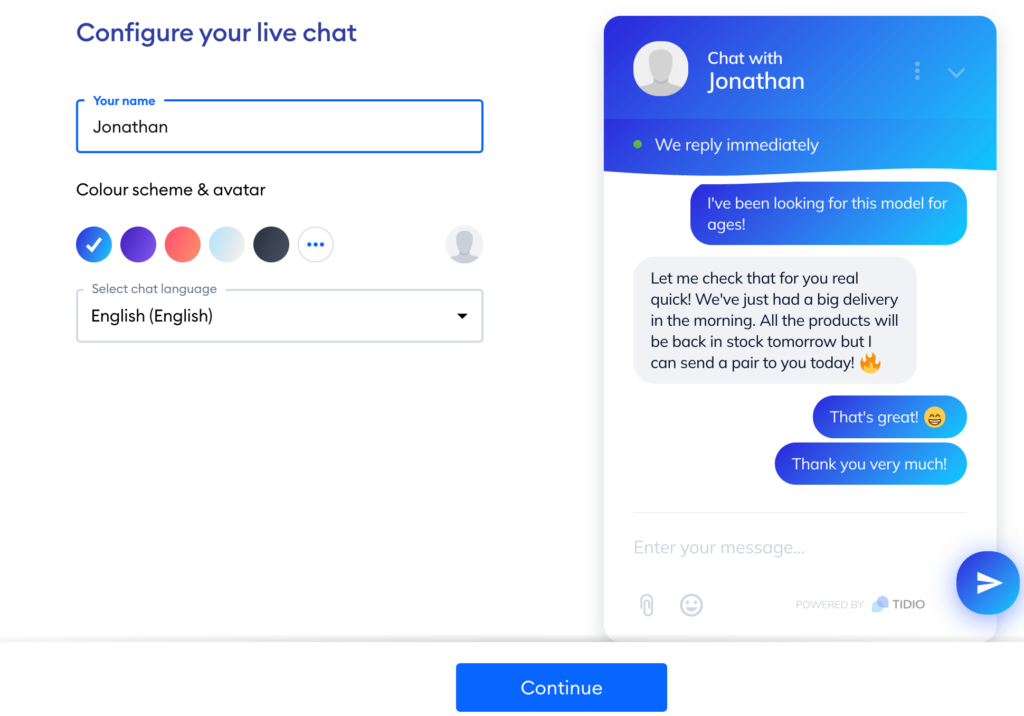
Now it is time to configure your live chat. Chose “Your name”, “Colour scheme” and “Chat Language”. After you have made your selections, click “Continue”.
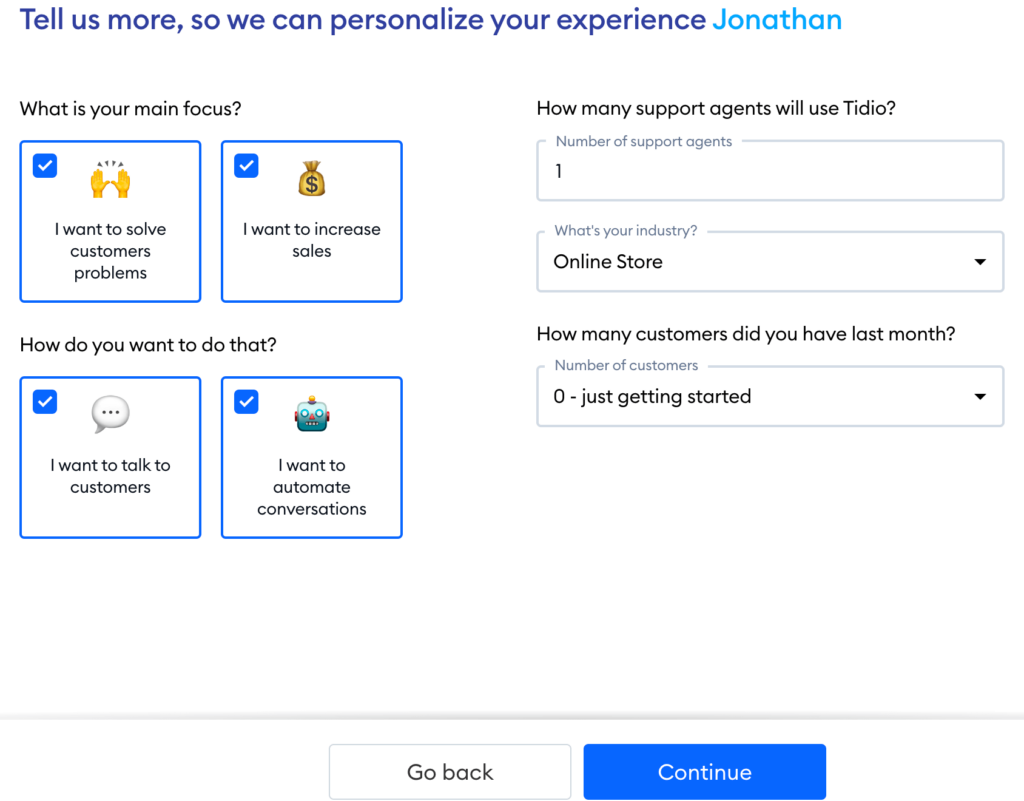
Now it is time to answer a few questions in order to personalise the live chat to your needs. Click “Continue” when you have made your choices.
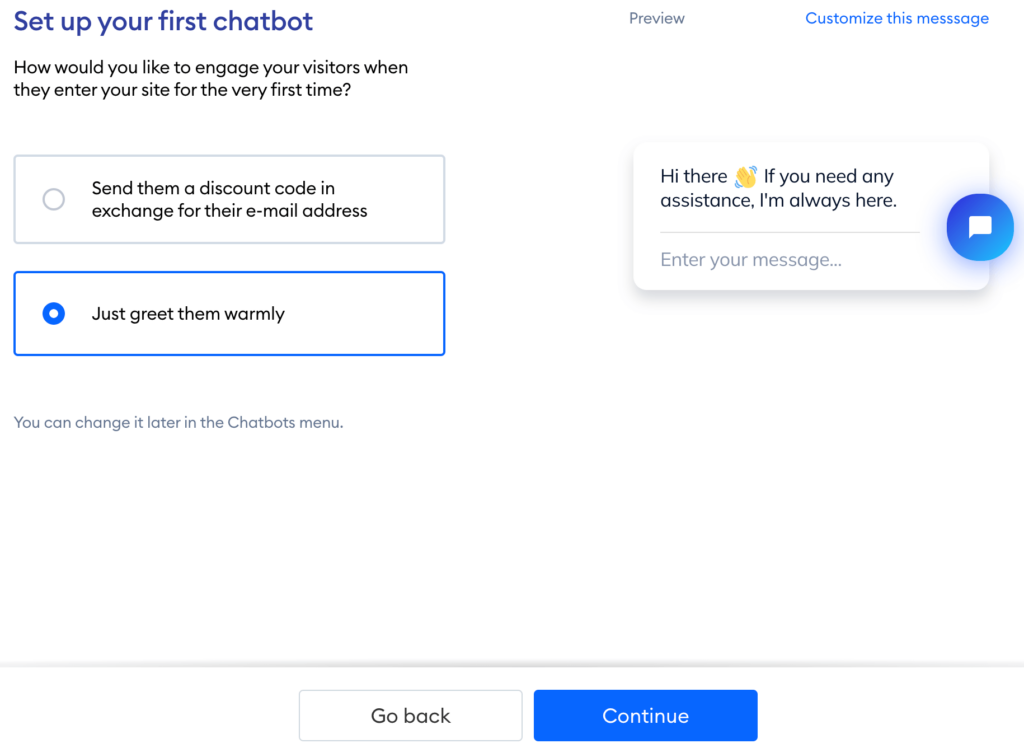
Choose one of the two options to add a chatbot to your website, click “Continue” when ready. Don’t worry, you can remove later if needed.
How to connect Tidio to your WordPress website?
Now it is time to add live chat to your website. Click “Continue” on the next page and close the tab once the Tidio Panel appears. Then it is time to follow the below instructions.
- Log in to your WordPress account and go to the Dashboard.
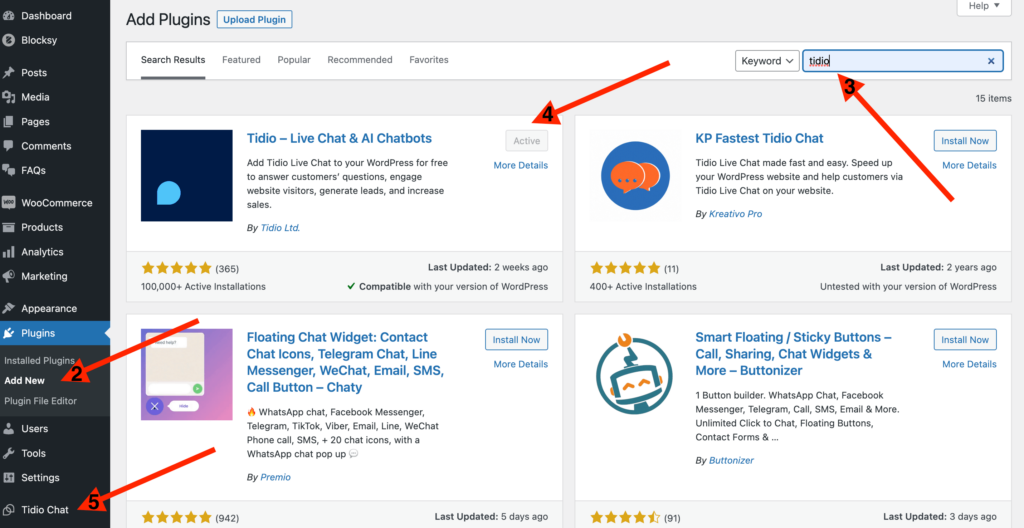
- Navigate to the “Plugins” section and select “Add New”.
- Type “Tidio” into the search bar and the plugin will appear.
- Hit the “Install New” button and then the click the “Activate” button when it is available.
- Click “Tidio Chat” in the left-hand side menu and it will take you to the Tidio Panel.
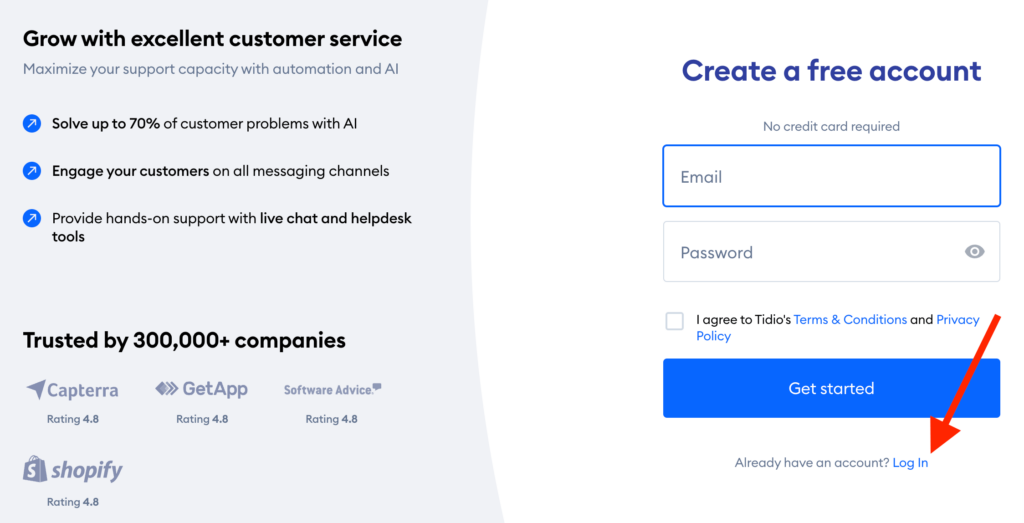
- Click on “Log in” and on the next page enter the email and password you signed up with earlier. Then click “Log in”.
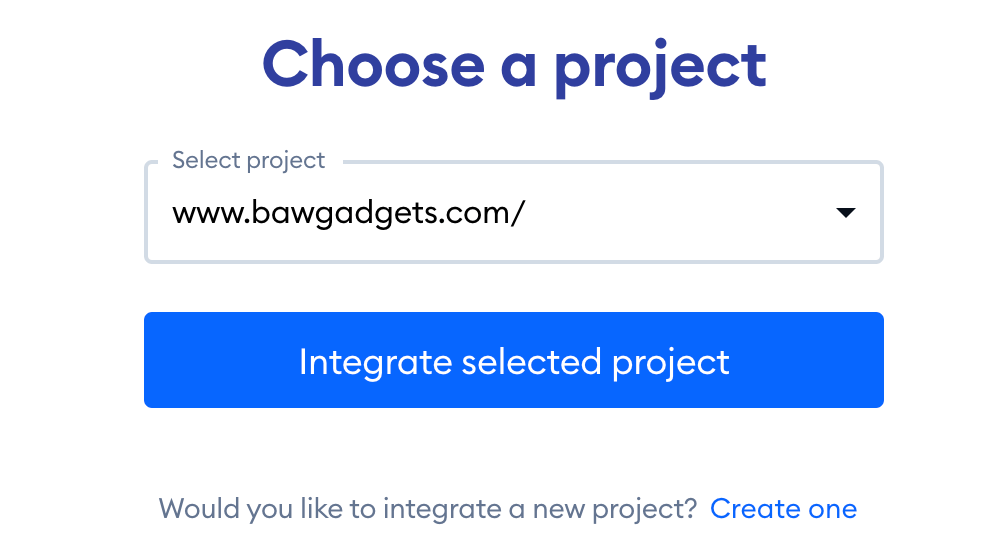
Choose the project you want to integrate with your website and then click “Integrate selected project” and you will arrive on another page where you should click “Open Tidio panel”.
How do you use Tidio Live Chat?
Now that you have learnt how to add Live Chat to your WordPress Website, it is now time to try the chat out on your website
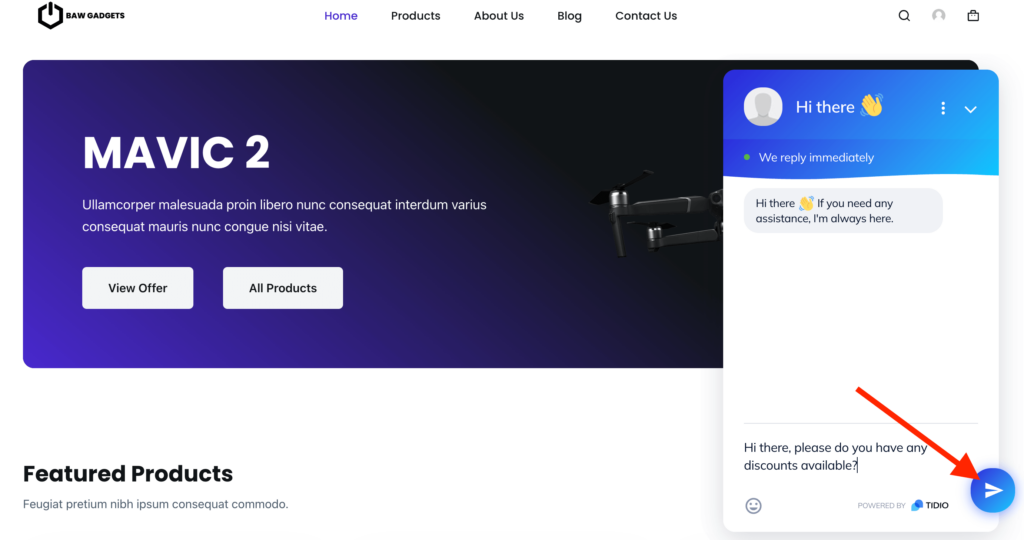
If you go to your website’s homepage, you will see the chatbot in the bottom right. Click on the chat icon and it will expand the chat where the visitor can type a message. When they have composed their message, they will click the send button.
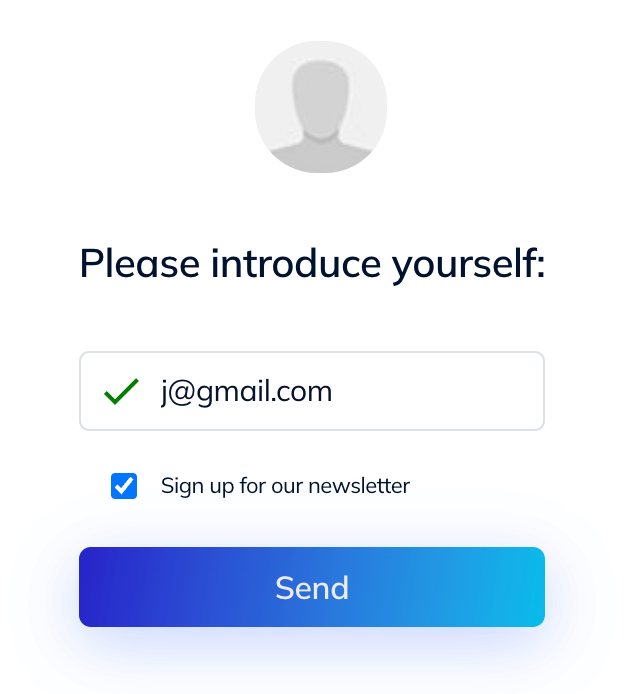
The Tidio chatbot will ask the customer to enter their email, choose to signup to the newsletter and finally click send. You can turn this off if you like (we will show later), however it is a great way to collect email addresses to respond to customers in the form of a newsletter.
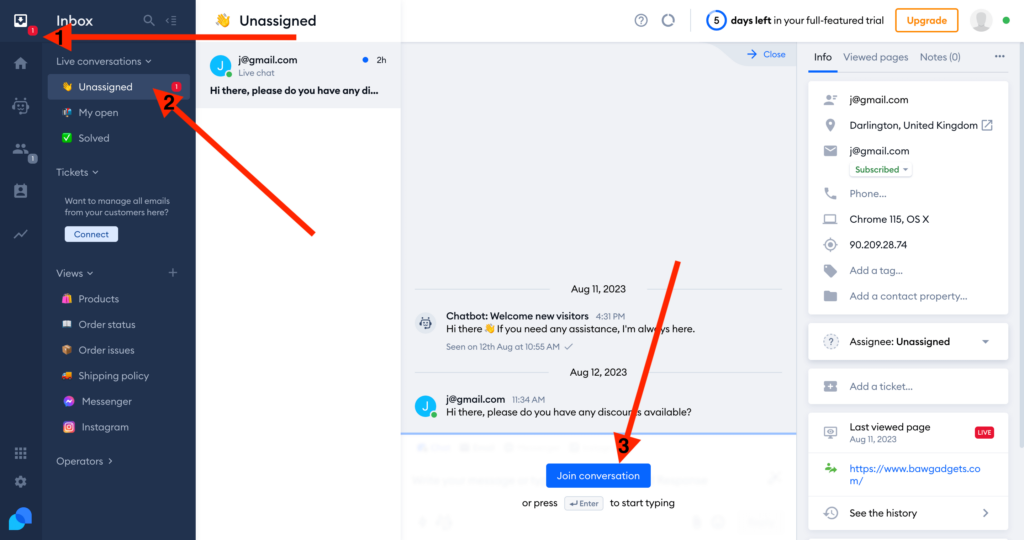
Go back into the Tidio Panel and click on the “Inbox” tab (1). Then click on the “Unassigned” tab (2).
Next it is time to reply to the message from the customer. To do that, click on “Join Conversation” (3) and the message will be assigned to the current operator. The status of the message will move from Unassigned to My open.
If you want to assign the message to another operator, click on the “Assignee” option and choose an operator to assign it to. Additional operators can be added in the Tidio settings – we will show you this later in the tutorial.
Write a reply (1) and then click the Reply Assistant AI (2), to generate a more professional response.
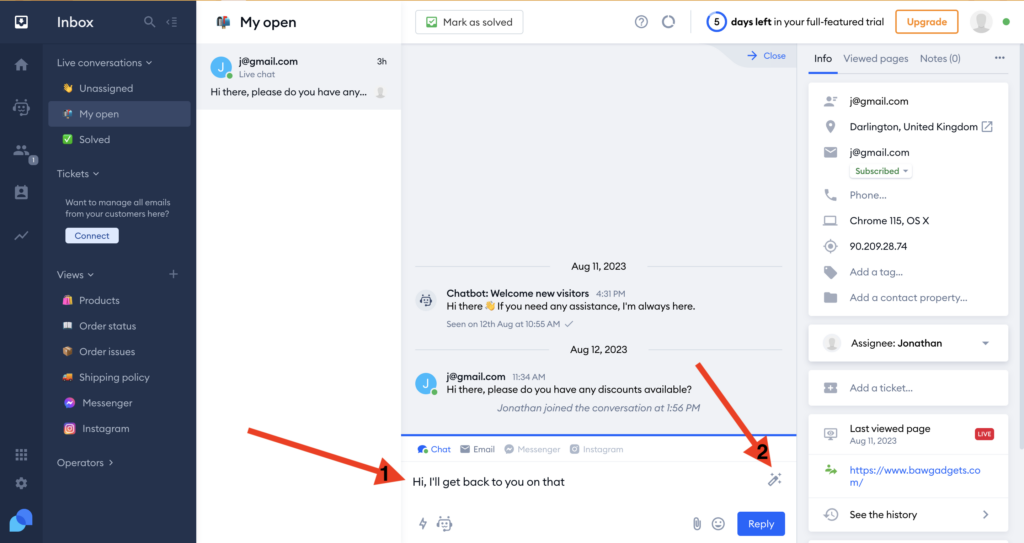
Once you are happy with the Reply Assistant’s response, click “Reply” and you will respond to the customer.
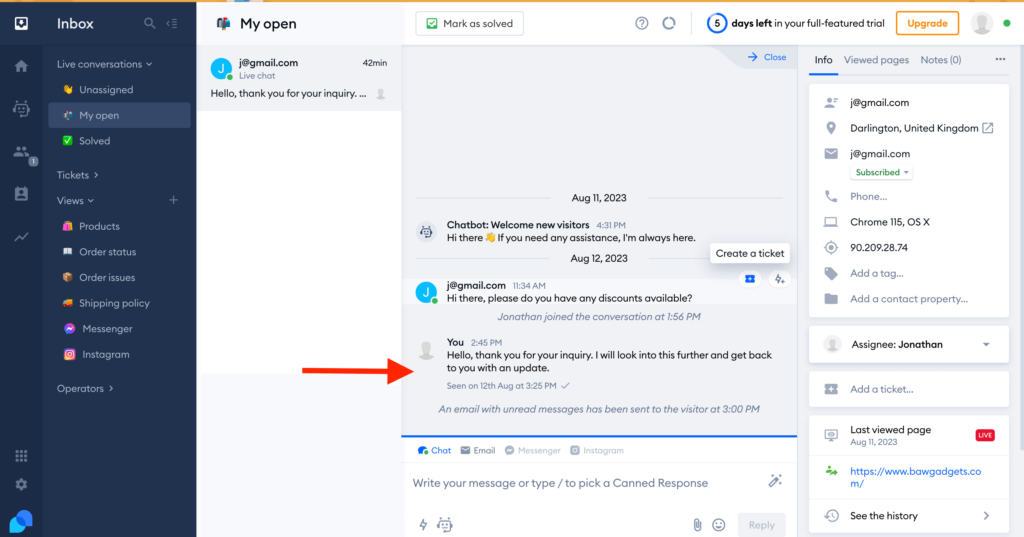
In Tidio you can create support tickets by hovering over a message and clicking “Create a ticket”. You and your team can then work on the ticket behind the scenes. Feel free to try it out!
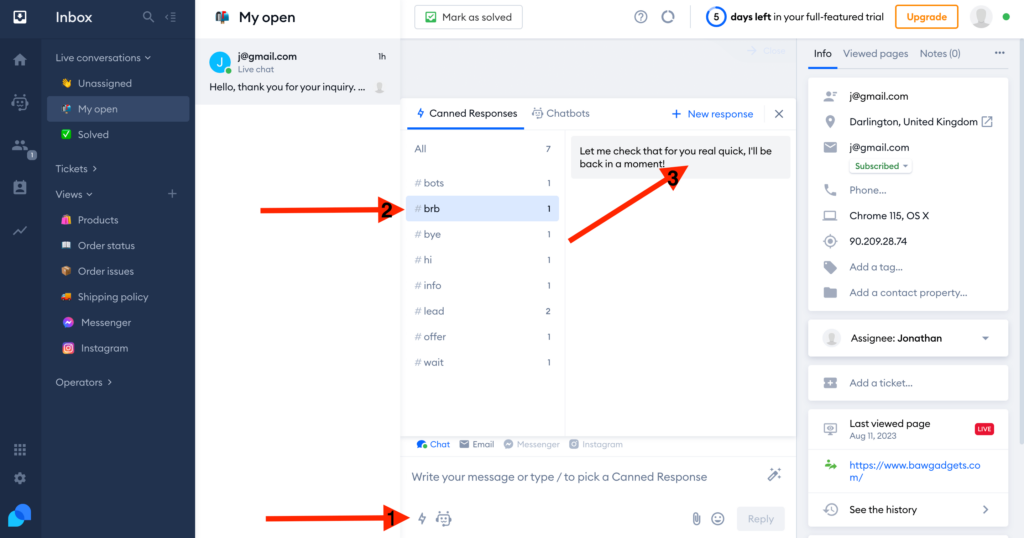
Canned Responses can be created in Tidio, this allows you to create pre-made responses to easily answer frequently asked questions. To reply with a Canned Response, click the Canned Responses button (1). Then choose what type of response you would like to send (2). Finally, double click on the response (3) and it will be available ready to send.
How to use AI Chatbots to save time and money?
Tidio have AI chatbots available that will respond to customer queries instantly. Tidio have developed an AI chatbot called Lyro that will solve up to 70% problems within seconds.
How to activate an AI chatbot in WordPress?
First of all you will have to make sure you have Tidio Live Chat active on your website. Next go to the “Chatbots” section (1) in the Tidio Panel and then click on “Lyro” (2). Next click on “Set up Lyro” (3) and on the popup click on “Accept” if you understand and agree to abide by the limitations.
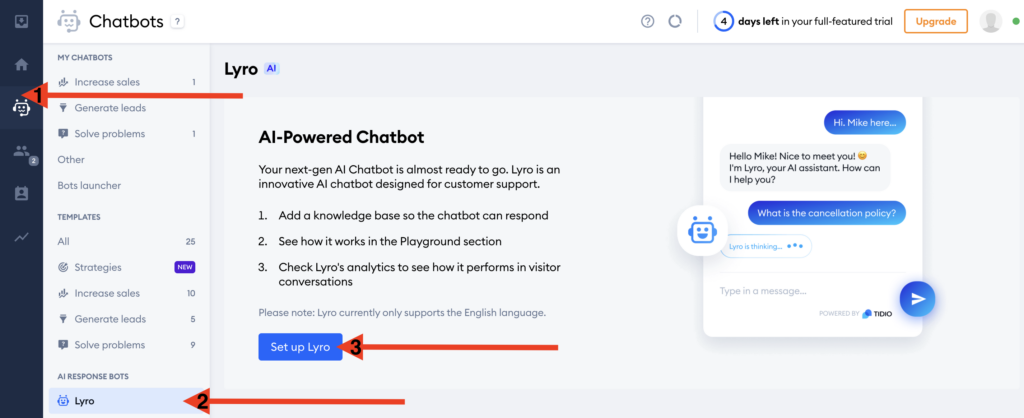
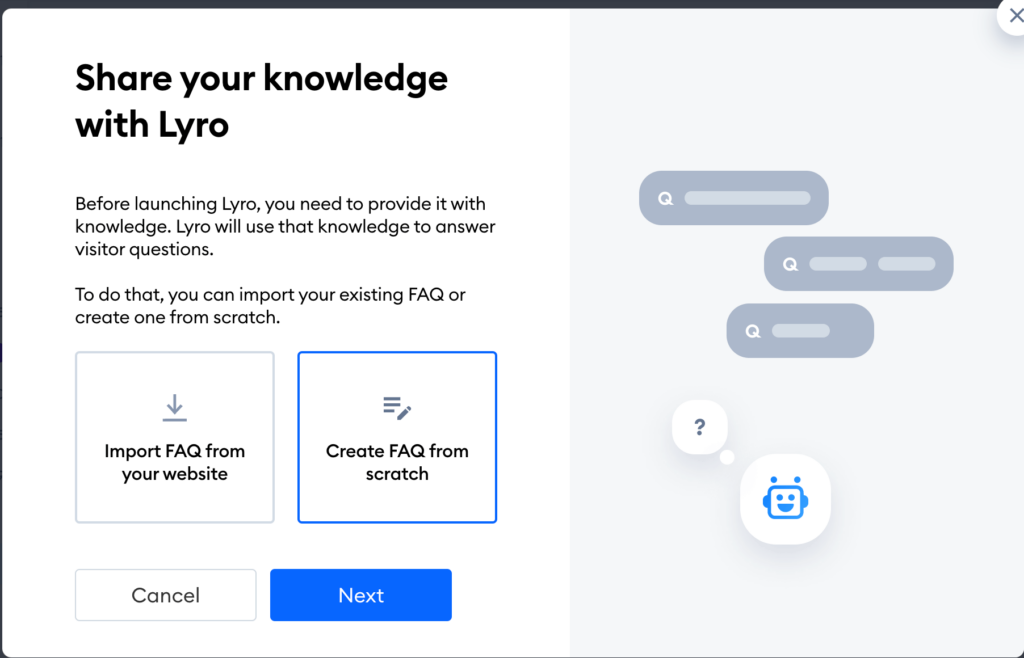
Lyro – Tidio’s AI Chatbot, uses pre-populated questions with answers to respond to questions instantly even if worded differently. You can choose whether to Import FAQ from your website or Create FAQ from scratch.
We will select “Create FAQ from scratch”, but if you have an FAQ page you can simply copy and paste the url of that page and Tidio will import the FAQ’s automatically.
When you have made your selection, click “Next”.
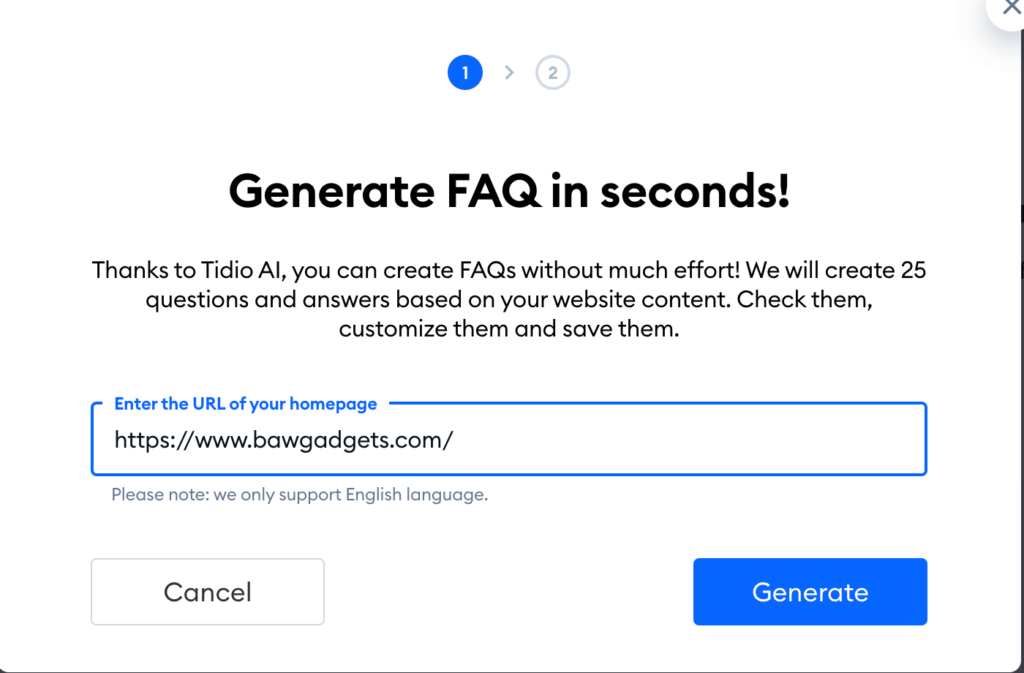
Tidio then asks you to provide the URL of the website. By entering the URL and clicking “Generate”, Tidio looks at the website content and automatically generates questions and answers. All of the questions and answers can be modified and deleted later on if needed.
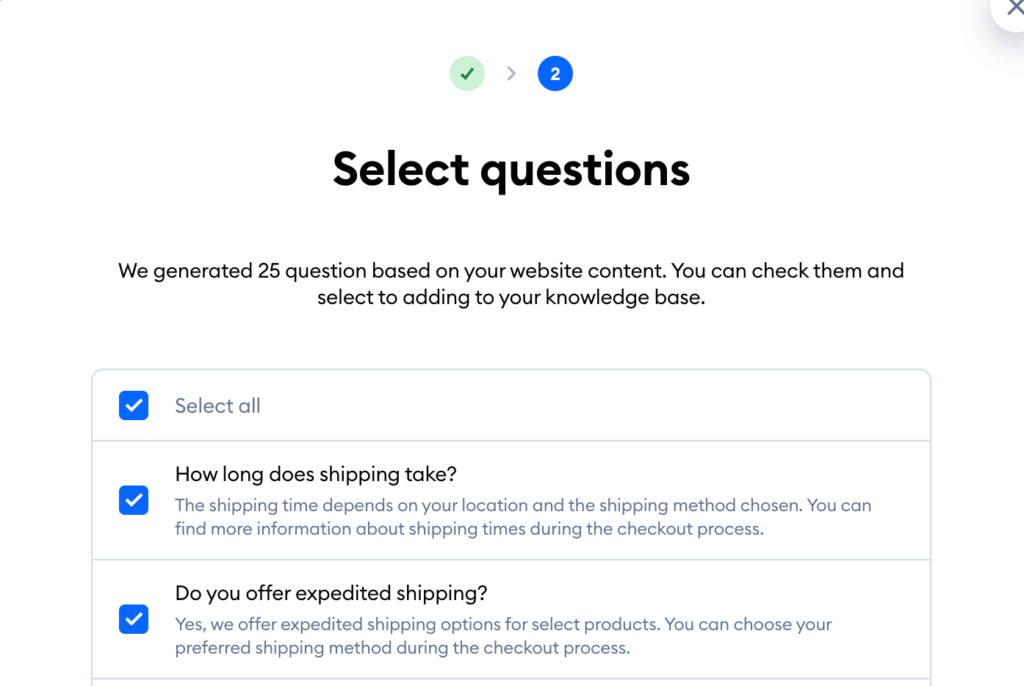
After clicking “Generate”, a pop up will appear that states it will take a few minutes to read the content on the website and create questions and answers. Once generated, the questions will appear where you can select if you want to add the questions to the website or not.
When you have made your selections, click “Add selected” at the bottom and the questions and answers will be created in Tidio.
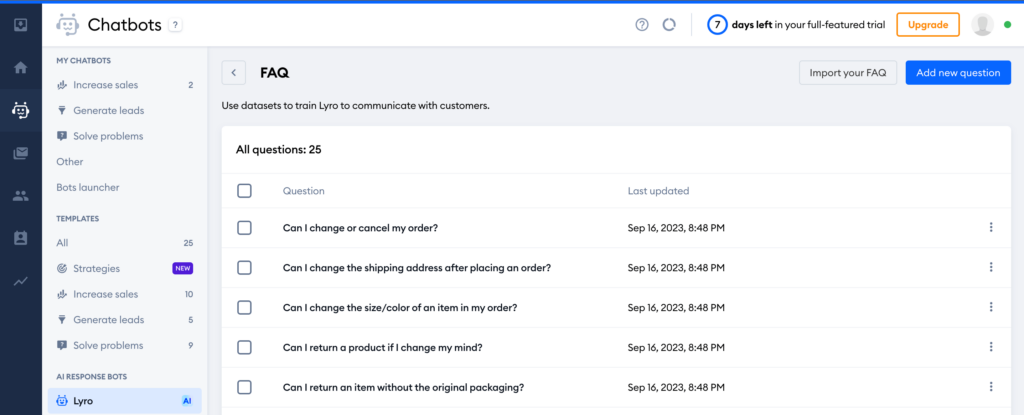
On the below page you can see the questions created by AI. It is possible to add new questions by clicking “Add new question” or import FAQ’s by clicking “Import your FAQ”.
You can also edit a question and answer by clicking on one of the questions. Deletion is possible by clicking on the 3 dots to right and choose “Delete”.
Click on “Lyro” on the menu at the side and choose “Activate Lyro” to make it live on your website.
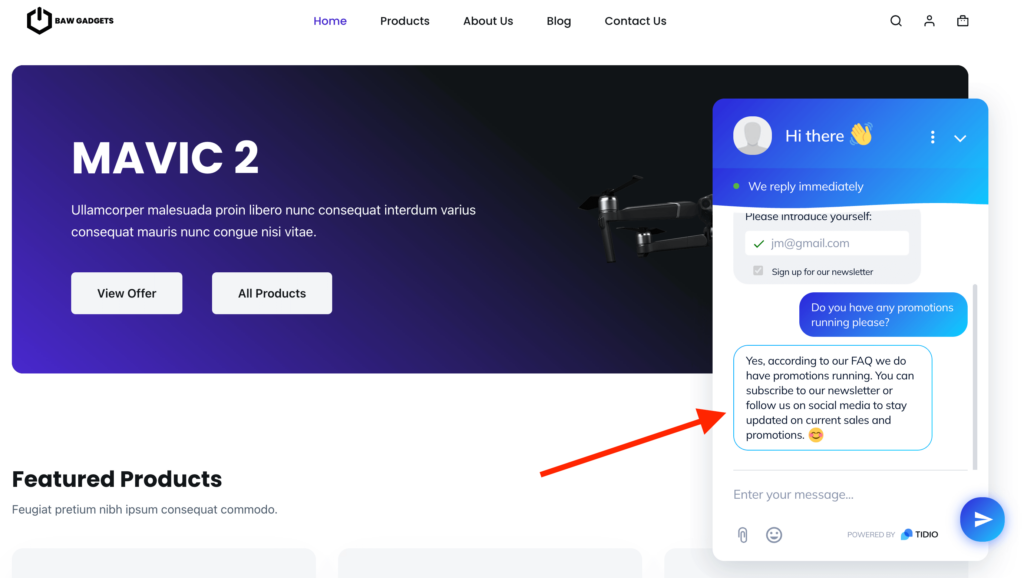
Now we will try the AI Chatbot out. One of pre-made questions is “Do you offer any discounts?”. We’ll ask “Do you have any promotions running please?”. You will be asked to enter an email address, this can be turned off by deleting the email address in the Pre-Chat Survey – this is shown later.
Notice how the question is different but Lyro AI manages to understand it and respond with a pre-made answer instantly.
What other chatbots are available in Tidio?
Tidio has a range of chatbots available in the Tidio Panel. Using pre-built templates you can send a welcome message to customers, send discounts, collect newsletter subscribers and much more.
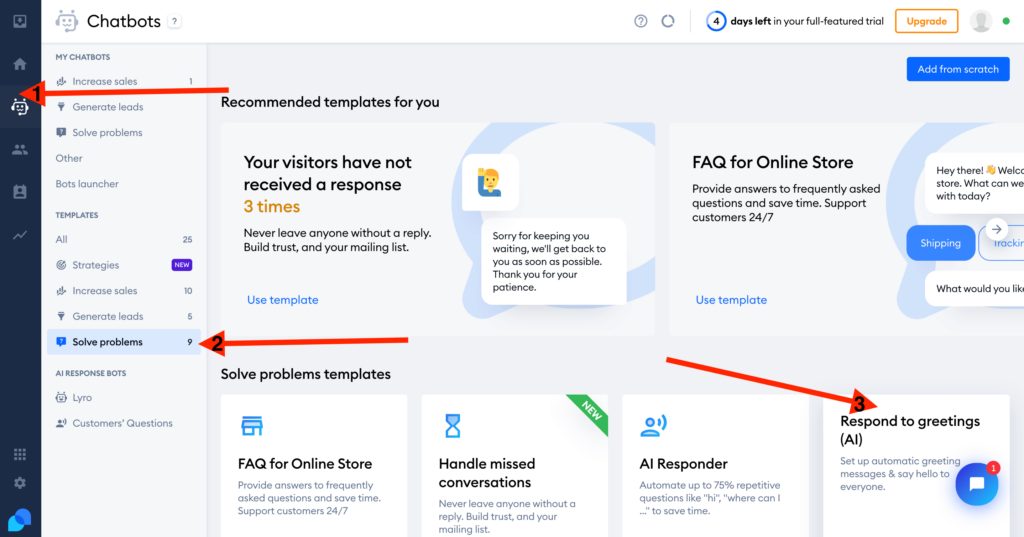
The first thing to do is click on the “Chatbots” section (1) in the Tidio Panel. Here you have all of the Chatbot templates available to save time and money. Feel free to try out as many as you like.
Next click on “Solve problems” (2) and click on “Respond to Greetings” template (3), this chatbot will respond to a message such as “Hi” and ask how it can assist. On the next page click on “Use template”. You can also click “Test it out” on each Chatbot to quickly see what is does.
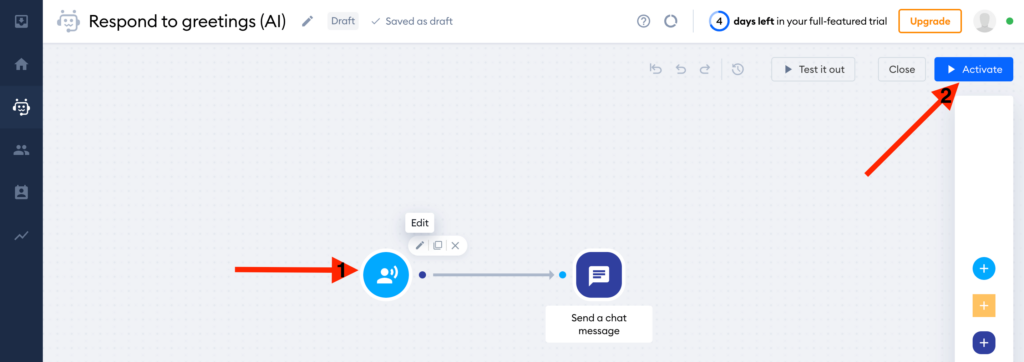
Now it is time to take a look at how the chatbot is built. You can edit parts of the chatbot by hovering over the nodes (1) and clicking on the pencil. By clicking “Activate” (2) you can make the chatbot live on your website.
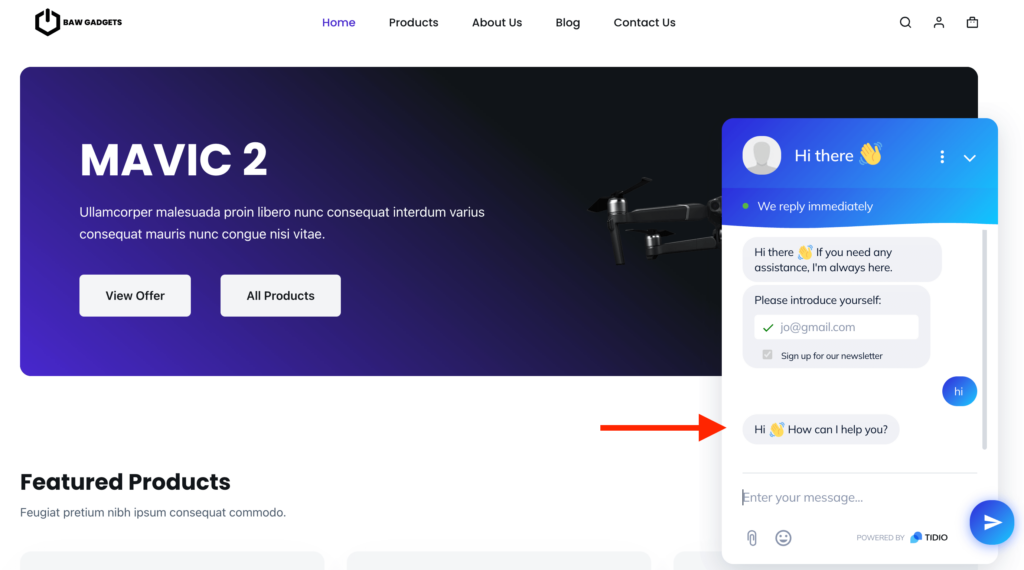
You can see the chatbot in action below, where the customer says “Hi” and the chatbots asks how it can help. It’s easy to see how this will save time for customer service teams.
Tidio Settings
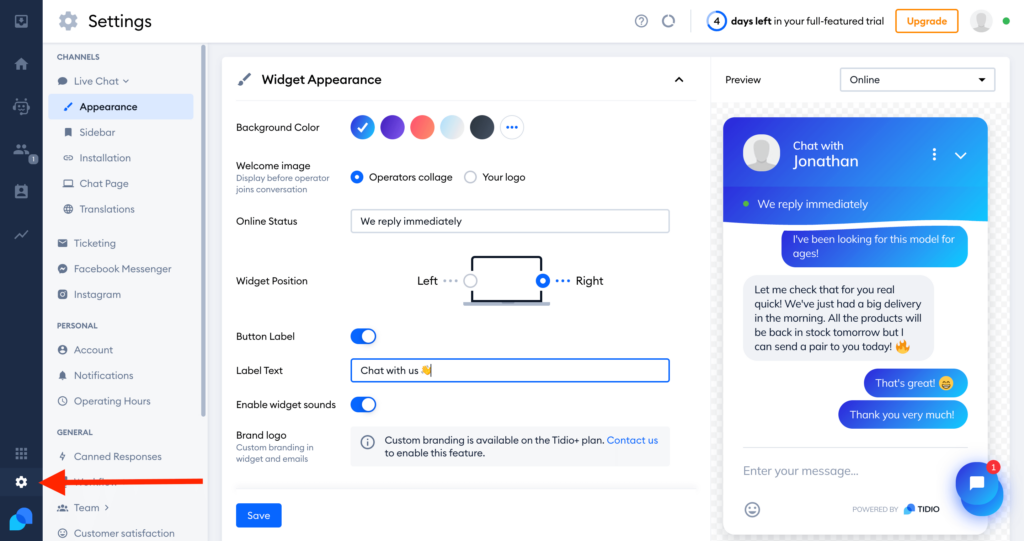
Go to the Tidio Panel and click on the “Settings” cog. You can change different settings in here and you will see the changes live on the widget on the right.
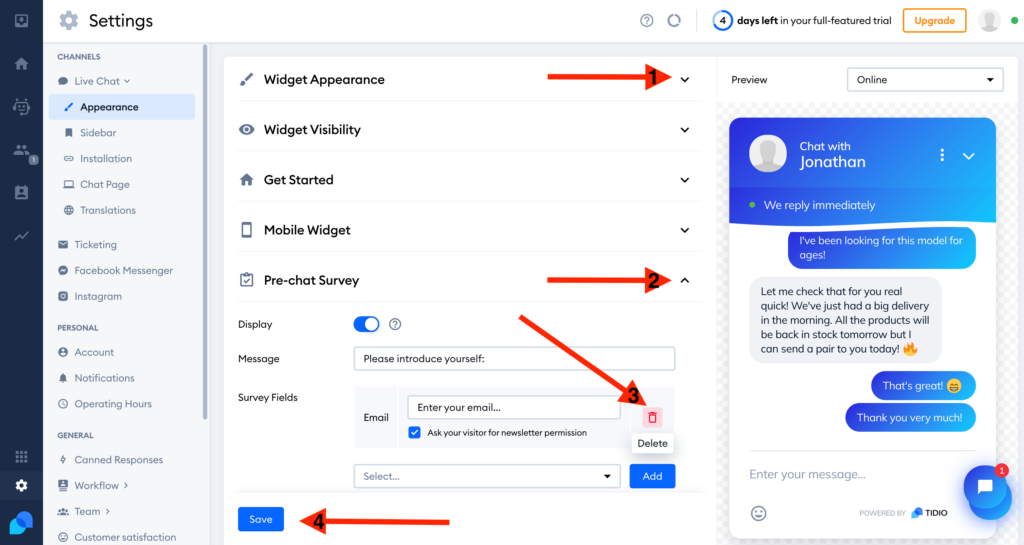
If you collapse Widget Appearance (1) and then expand Pre-chat Survey (2) you can then choose to delete (3) the need to collect email addresses. If you to decide to do this, click “Save” (4).
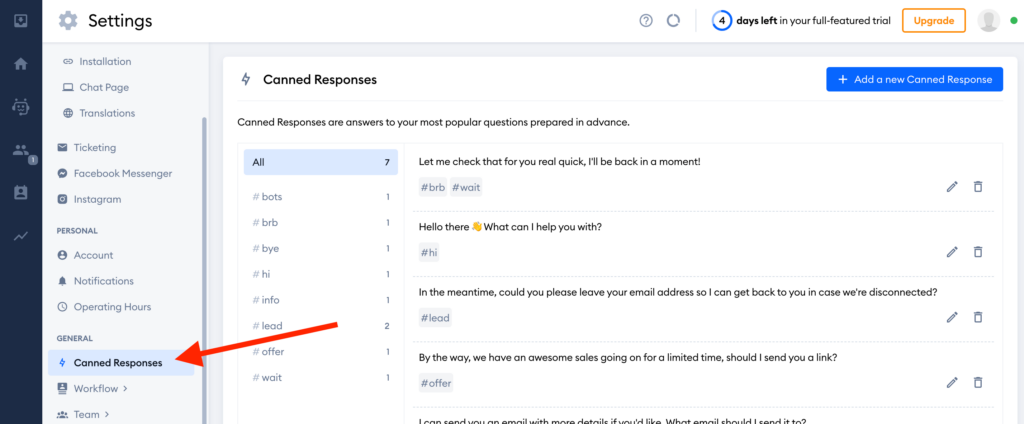
Canned Response can also be added, edited and removed in the section below.
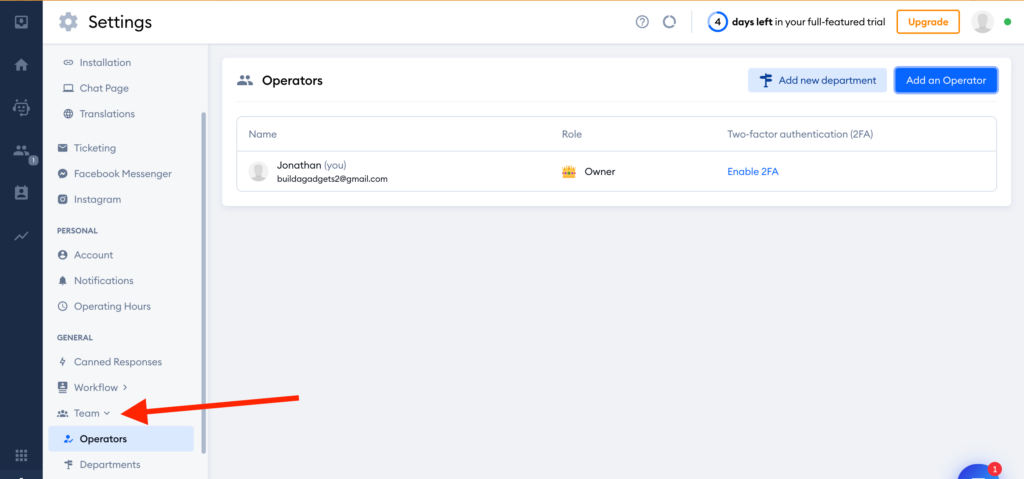
You can add other operators in the below section. It is also possible to create Departments and put the Operators in different departments. For example you could have Operators that only pickup messages regarding Refunds.
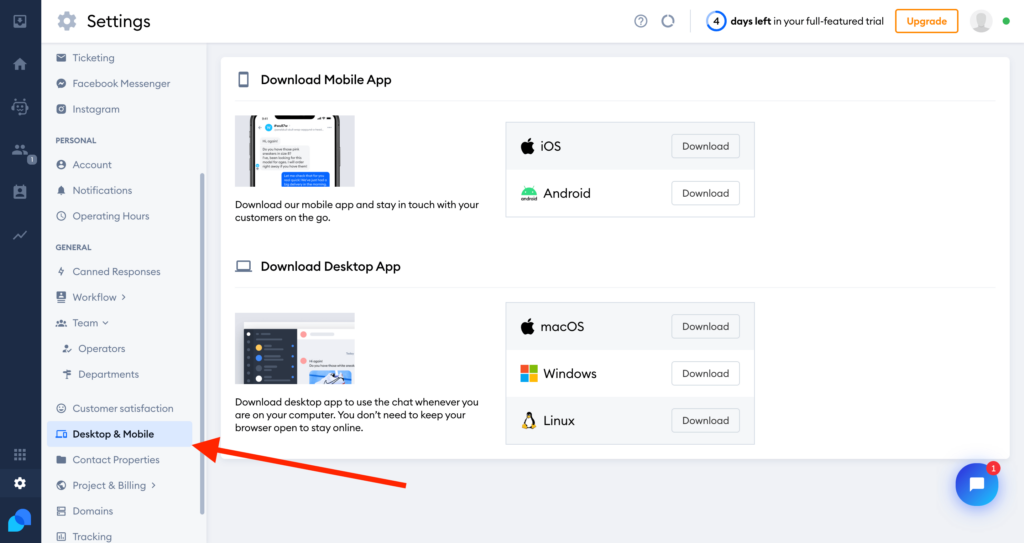
Tidio can be downloaded on IOS and Android devices, so that messages can be replied to when support staff are on the go. A desktop app can also be downloaded, meaning you don’t have to have your browser open to stay online.
In this tutorial we have shown how to add live chat to your WordPress website. We introduced AI Chatbots to show how you can automate visitor queries.
We have more Tidio tutorials planned for the future, such as more Chatbot tutorials, Ticketing and Integration with Facebook and Instagram
Please check out some of our other tutorials
Thank you for reading
Jonathan @ Buildawebs
